Introduction
MMcloud provides a checkpoint solution that:
- captures the complete application state, both memory and file system
- is transparent to the application, ie. no application change is needed
- causes minimal overhead, ie. second-level wall clock time per checkpoint
- is automated after integration with the customer orchestration environment.
MM checkpoint protects the application progress, which enables applications to be migrated across both compute nodes and execution time. The specific use cases include:
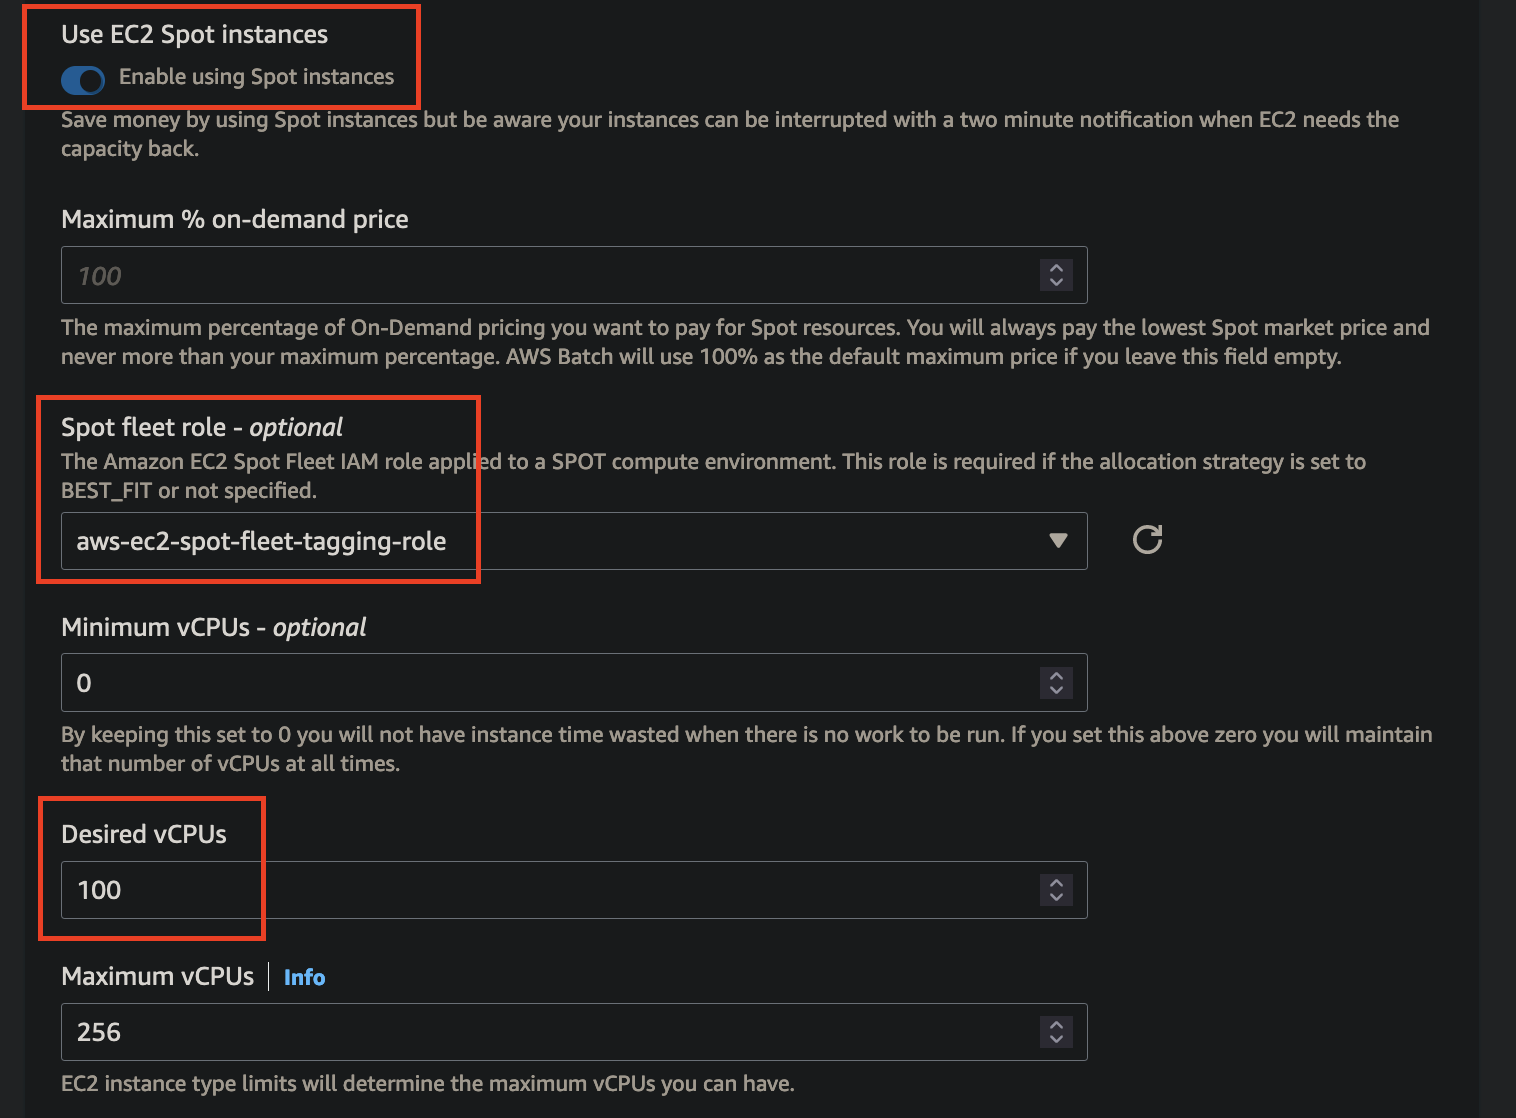
- Reduced operational costs, by replacing expensive On-demand VM instances with cheaper but less reliable Spot VM instances
- Faster time to result, by capturing the application states in execution and sharing progress in later pipeline stages or with the team members
- Higher resource utilization, by dynamically migrating applications to the right-sized VM instances or scheduling to run only in off-peak times
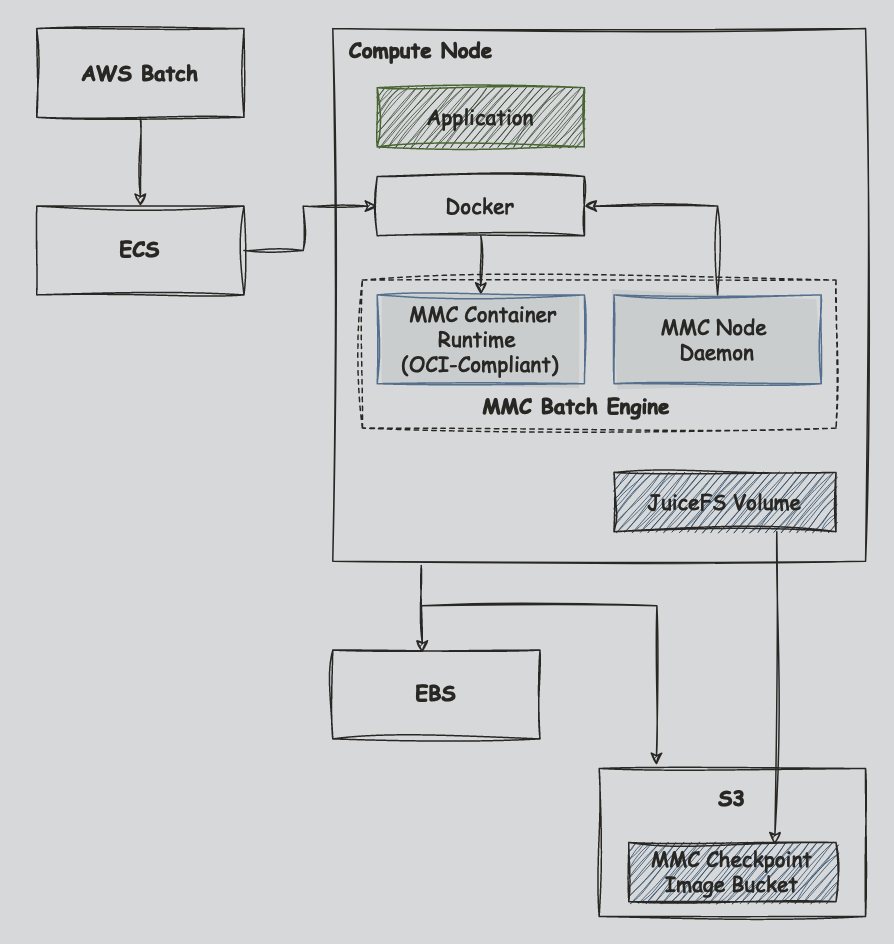
Types of file systems supported for storing checkpoint data:
- AWS EFS
- AWS FsX Lustre
- Juicefs with AWS S3
Steps
Nextflow Snapshot Engine AMI
-
We will provide an AMI customized for nextflow execution on AWS Batch with MMC Snapshot Engine built in.
-
We can also provide the snapshot engine release bin file to customize the AMI even further based on customer requirements
Set up metadata database for JuiceFS
-
There are a number of ways to set up a database server for JuiceFS, specifically for a distributed Juicefs. Options include Amazon Elastic Cache, MemoryDB, and Amazon RDS.
-
This quick-guide uses Amazon RDS (if you are not using this option, skip to the Create Launch Template after you have created a metadata server with the other options).
-
For this option, you must create a database within your RDS before using. This is a one-time thing. You can spin up a new instance and follow these steps:
- Install JuiceFS
- Install mysql locally
- Connect to your metadata server in this format
mysql -h tutorial-database-1-instance-1.cepmeznhgaxt.us-east-1.rds.amazonaws.com -P 3306 -u admin -pPASSWORDThere is no space between the -p and your password (from RDS setup)
- Create a database. This example names their database juicefs
create database juicefs; - Then, exit the mysql
exit Create EC2 Launch Template
-
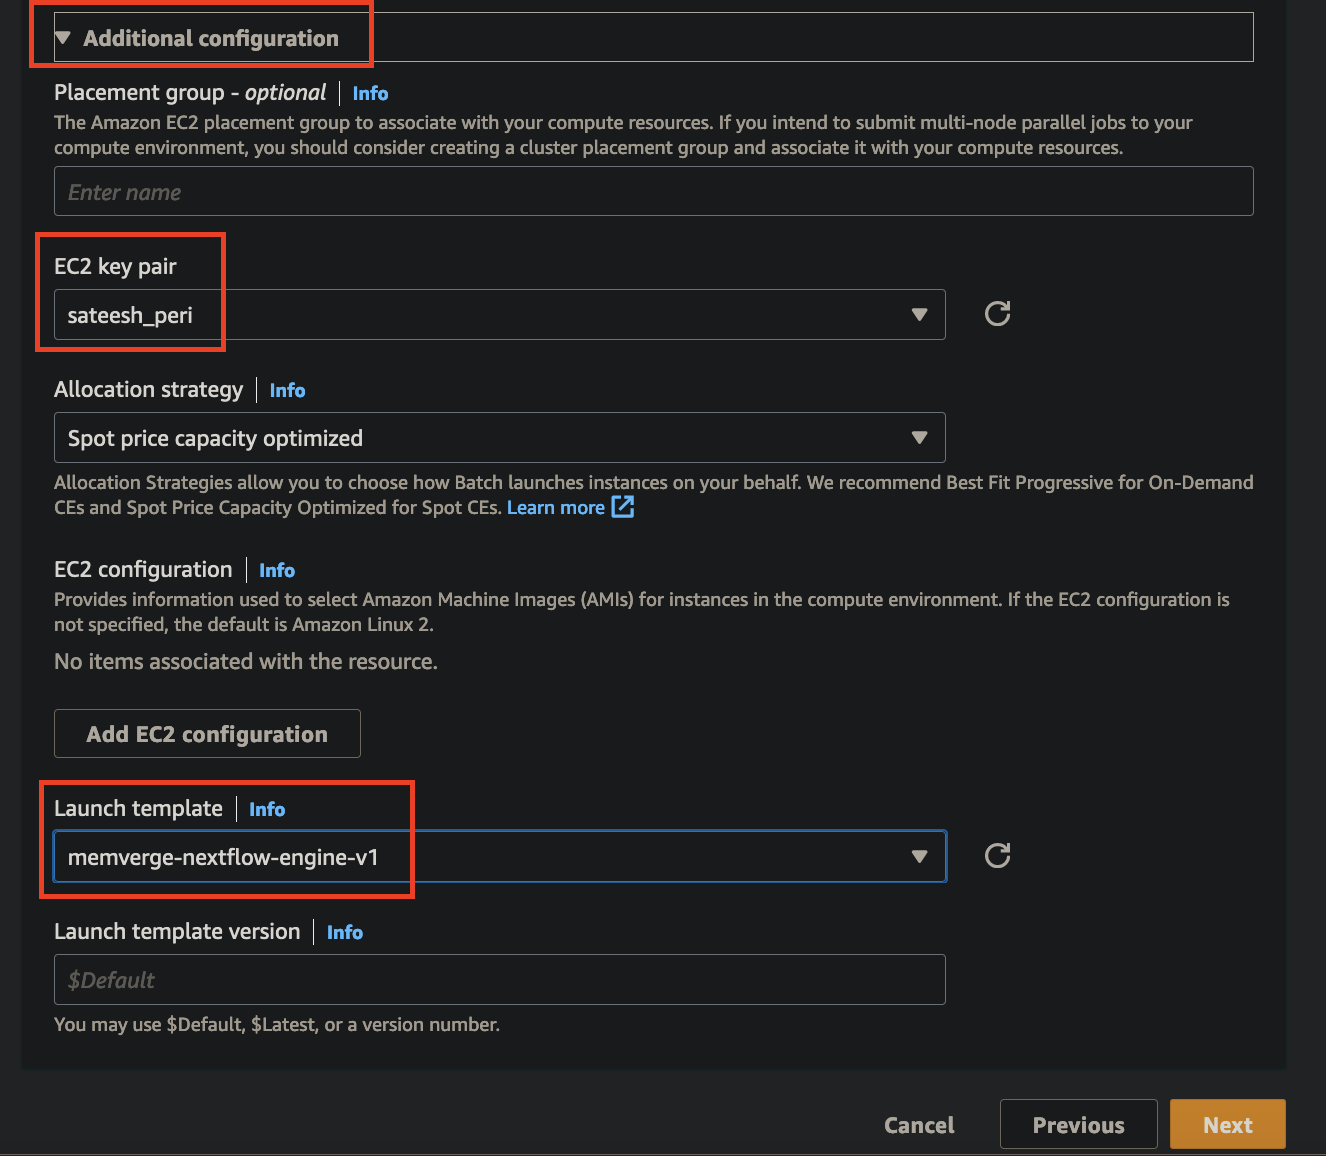
After your AMI is created, create a launch template. The core components are:
- New AMI
- SSH Key
- User Data
-
Format and Mount JuiceFS, which requires
- Bucket
- Access Keys
- Checkpoint directory (same one used in packer setup)
- Metadata server address, username, password, and database name
-
Below is an example of the User Data. Make sure it is in proper MIME format.
Content-Type: multipart/mixed; boundary="//"
MIME-Version: 1.0

--//
Content-Type: text/cloud-config; charset="us-ascii"
MIME-Version: 1.0
Content-Transfer-Encoding: 7bit
Content-Disposition: attachment; filename="cloud-config.txt"

#cloud-config
cloud_final_modules:
- [scripts-user, always]

--//
Content-Type: text/x-shellscript; charset="us-ascii"
MIME-Version: 1.0
Content-Transfer-Encoding: 7bit
Content-Disposition: attachment; filename="userdata.txt"

#!/bin/bash
juicefs format --storage s3 --bucket https://<BUCKET_NAME>.s3.us-east-1.amazonaws.com 'mysql://<USERNAME>:<PASSWORD>@(<METADATA_ADDRESS>:3306)/<DATABASE_NAME>' myjfs-rds --access-key xxx --secret-key yyy
sudo mkdir -p /memverge-mm-checkpoint
sudo chmod 777 /memverge-mm-checkpoint
juicefs mount 'mysql://<USERNAME>:<PASSWORD>@(<METADATA_ADDRESS>:3306)/<DATABASE_NAME>' /memverge-mm-checkpoint &
--//--
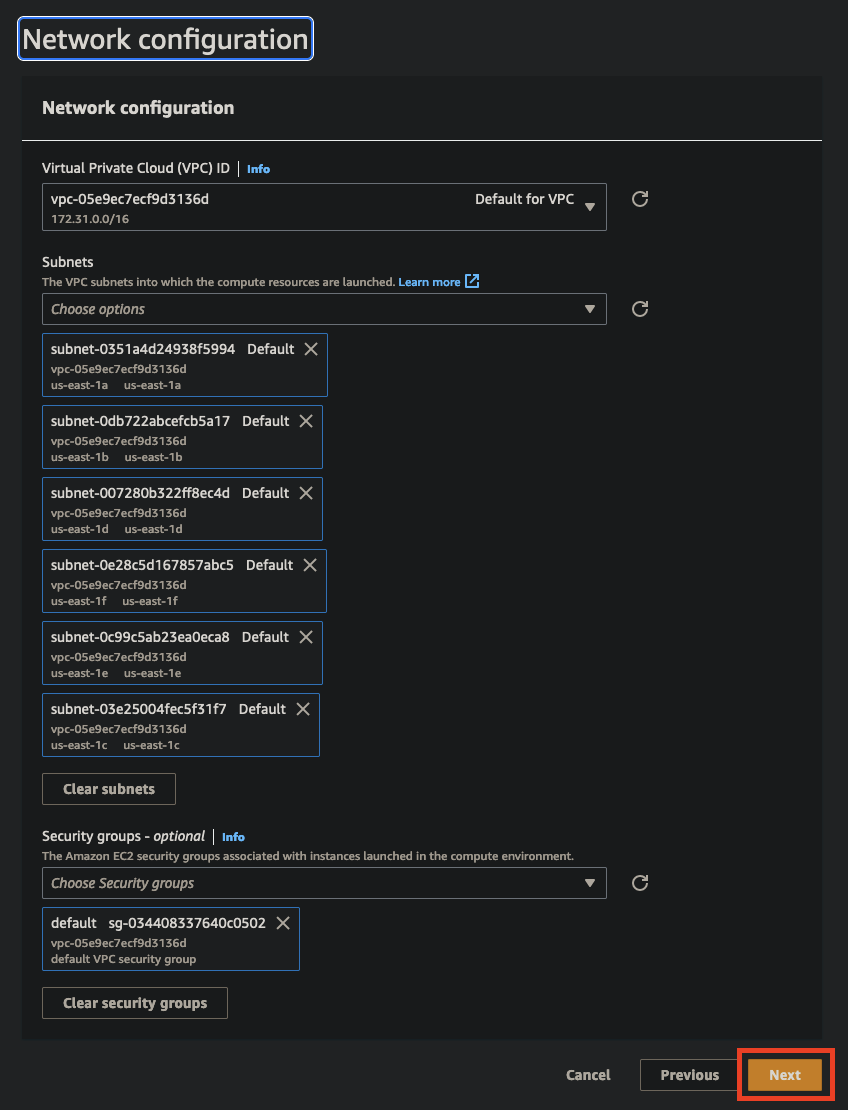
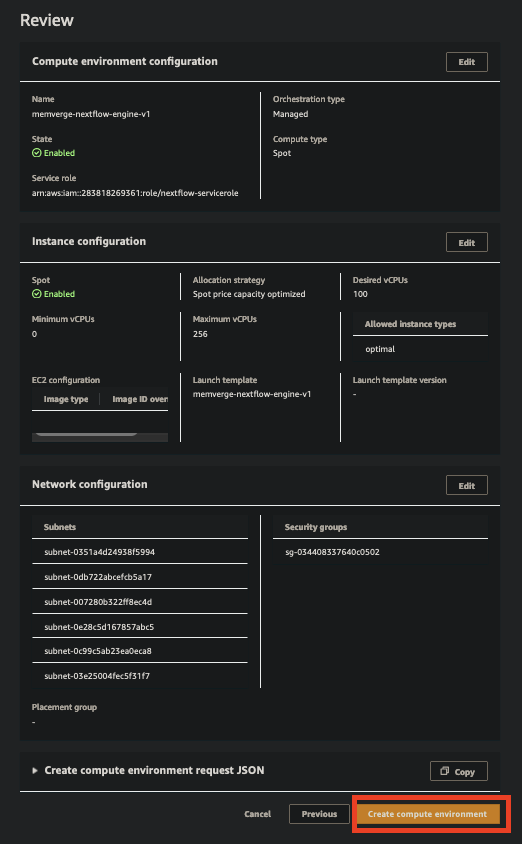
AWS Batch Compute Environment
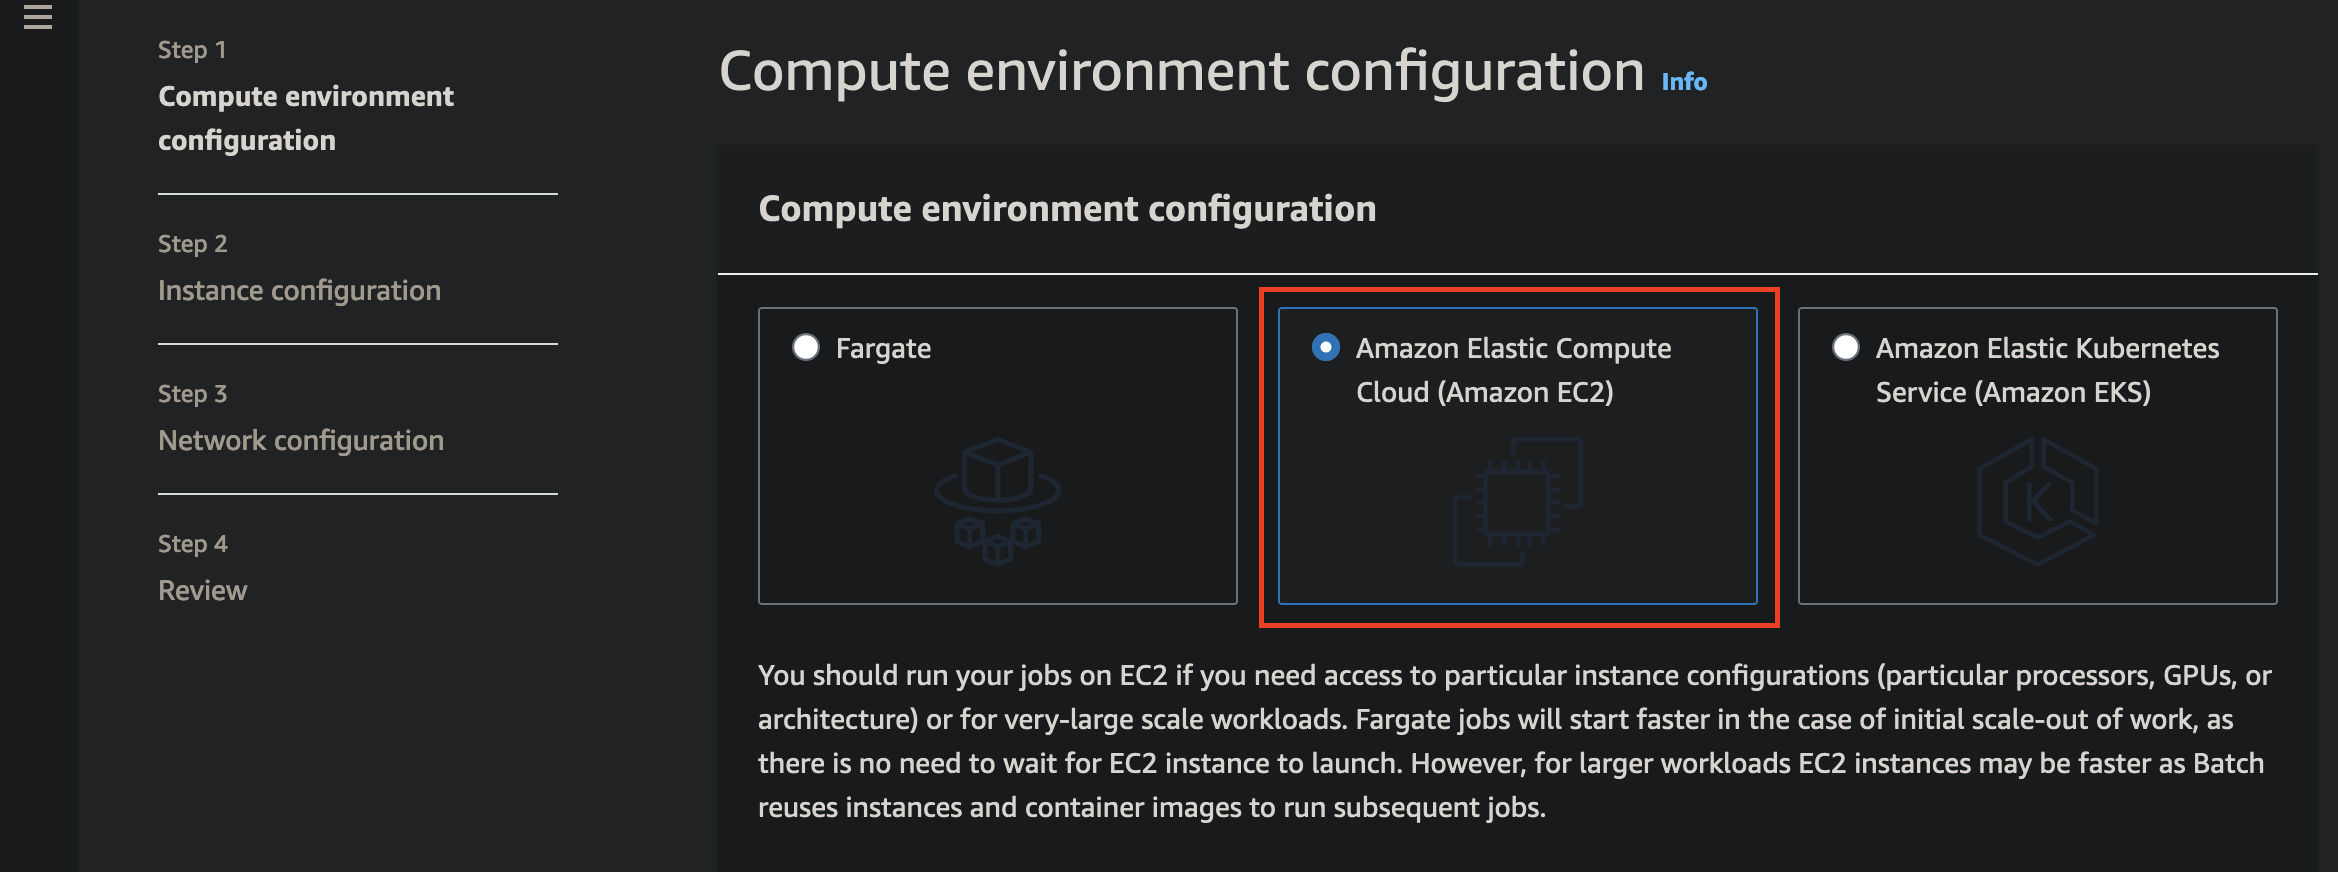
- Amazon EC2 configuration
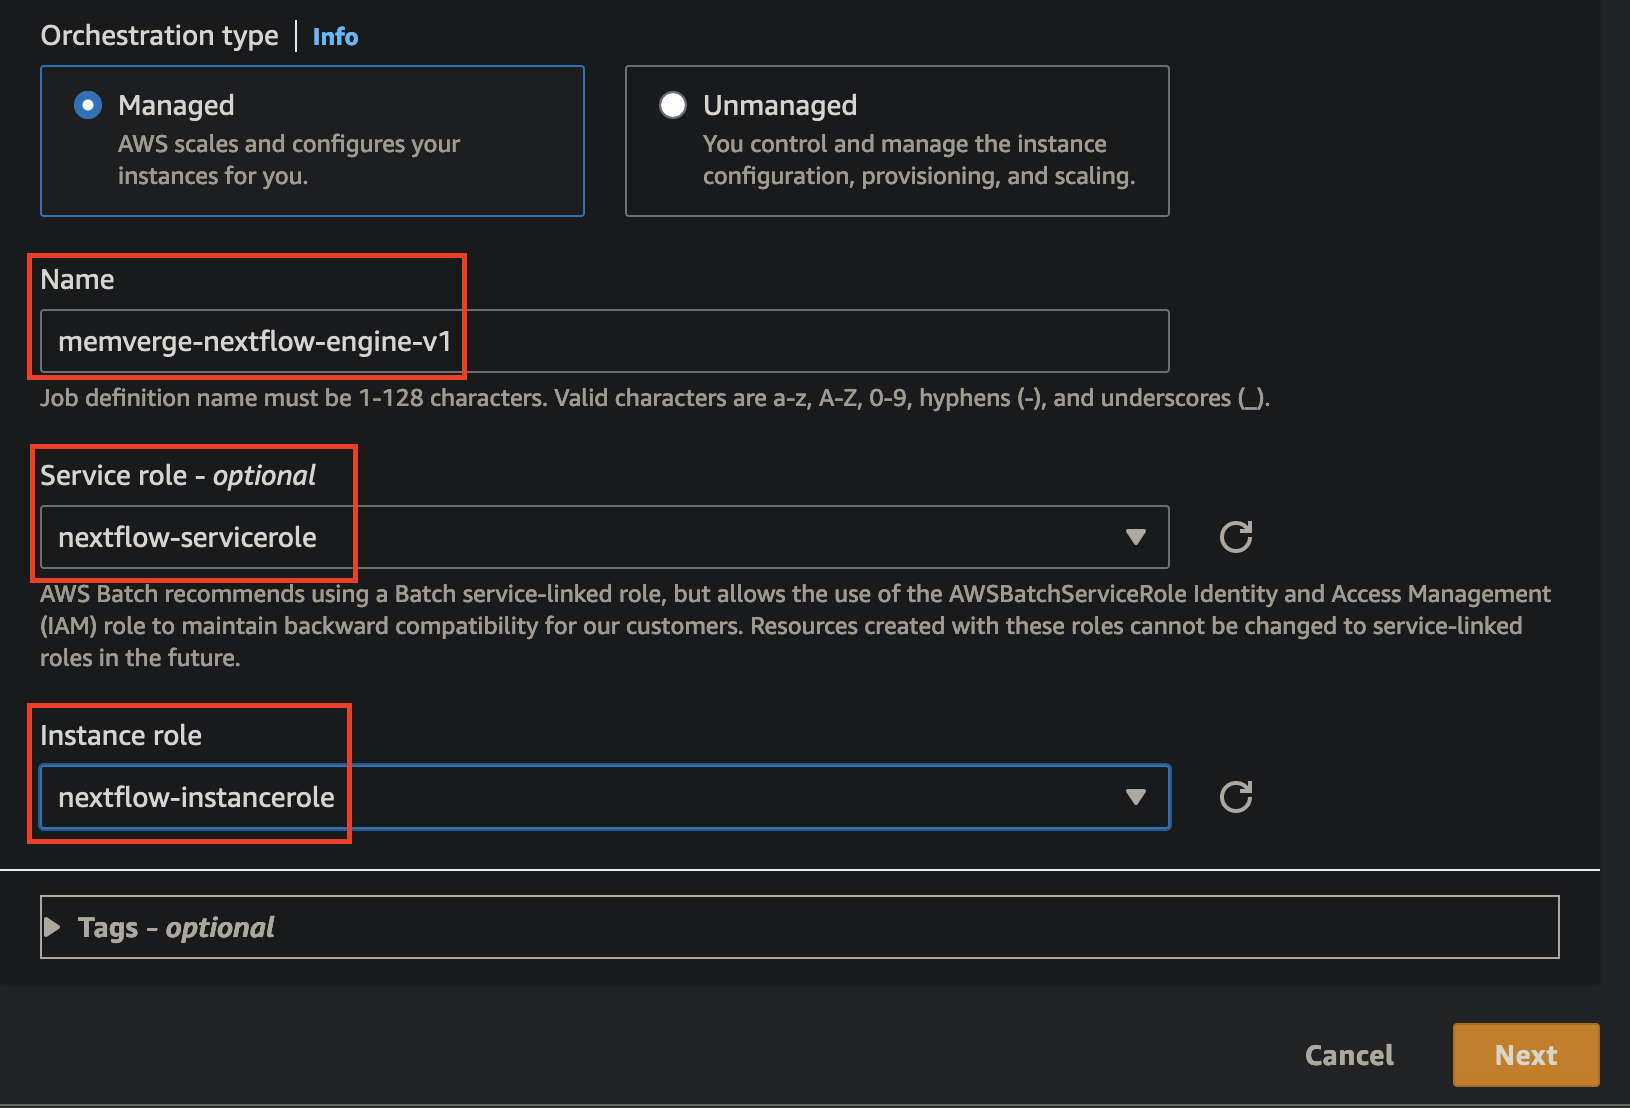
- Instance role - ecsInstanceRole (should already exist in your account)
- Service role - AWSServiceRoleForBatch (should already exist in your account)
- Default network setup

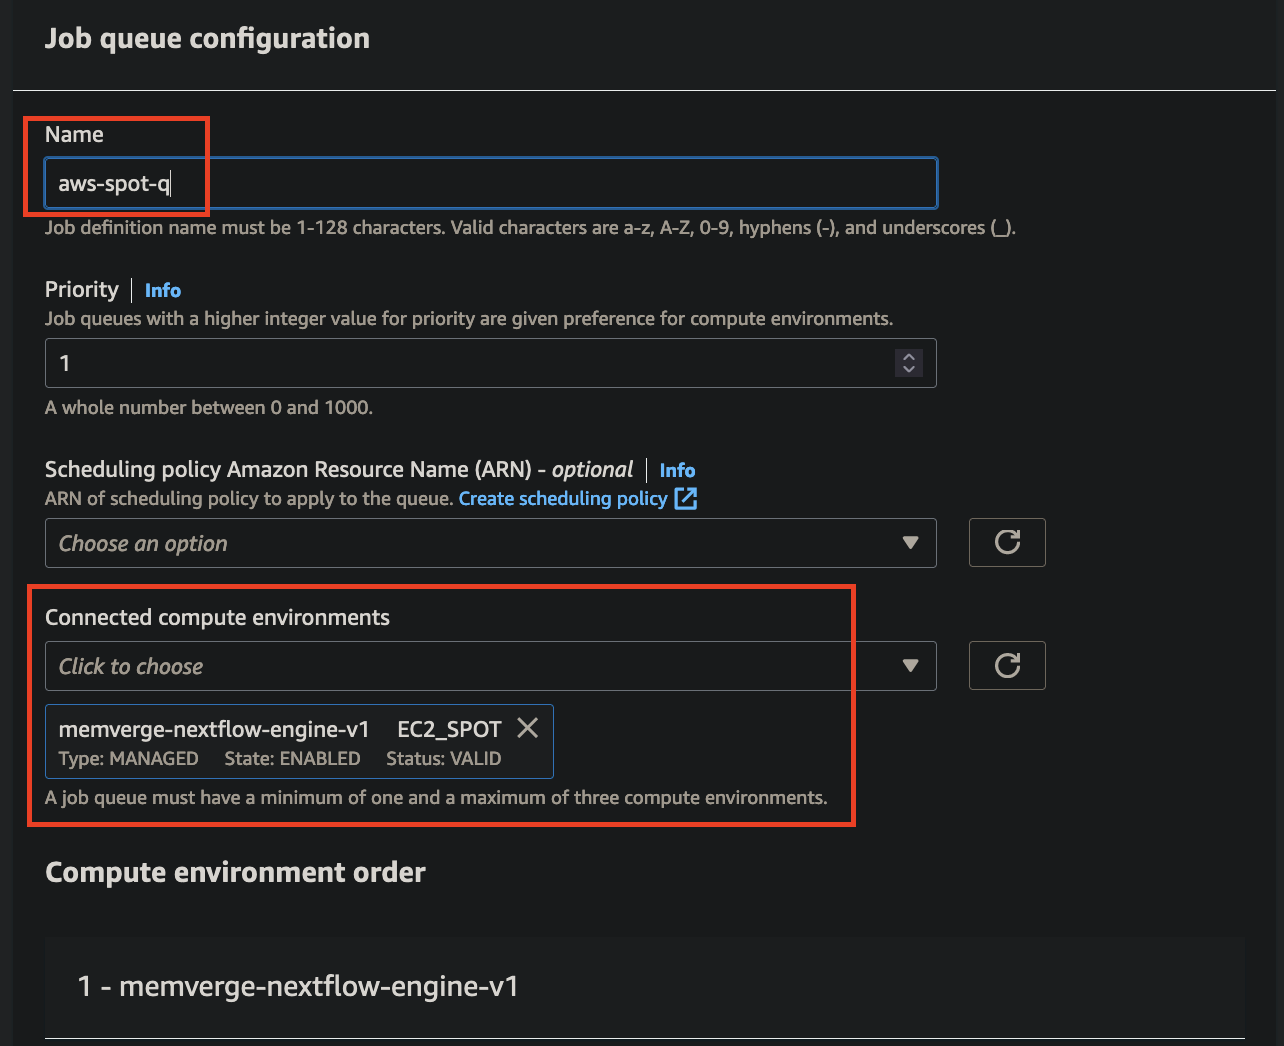
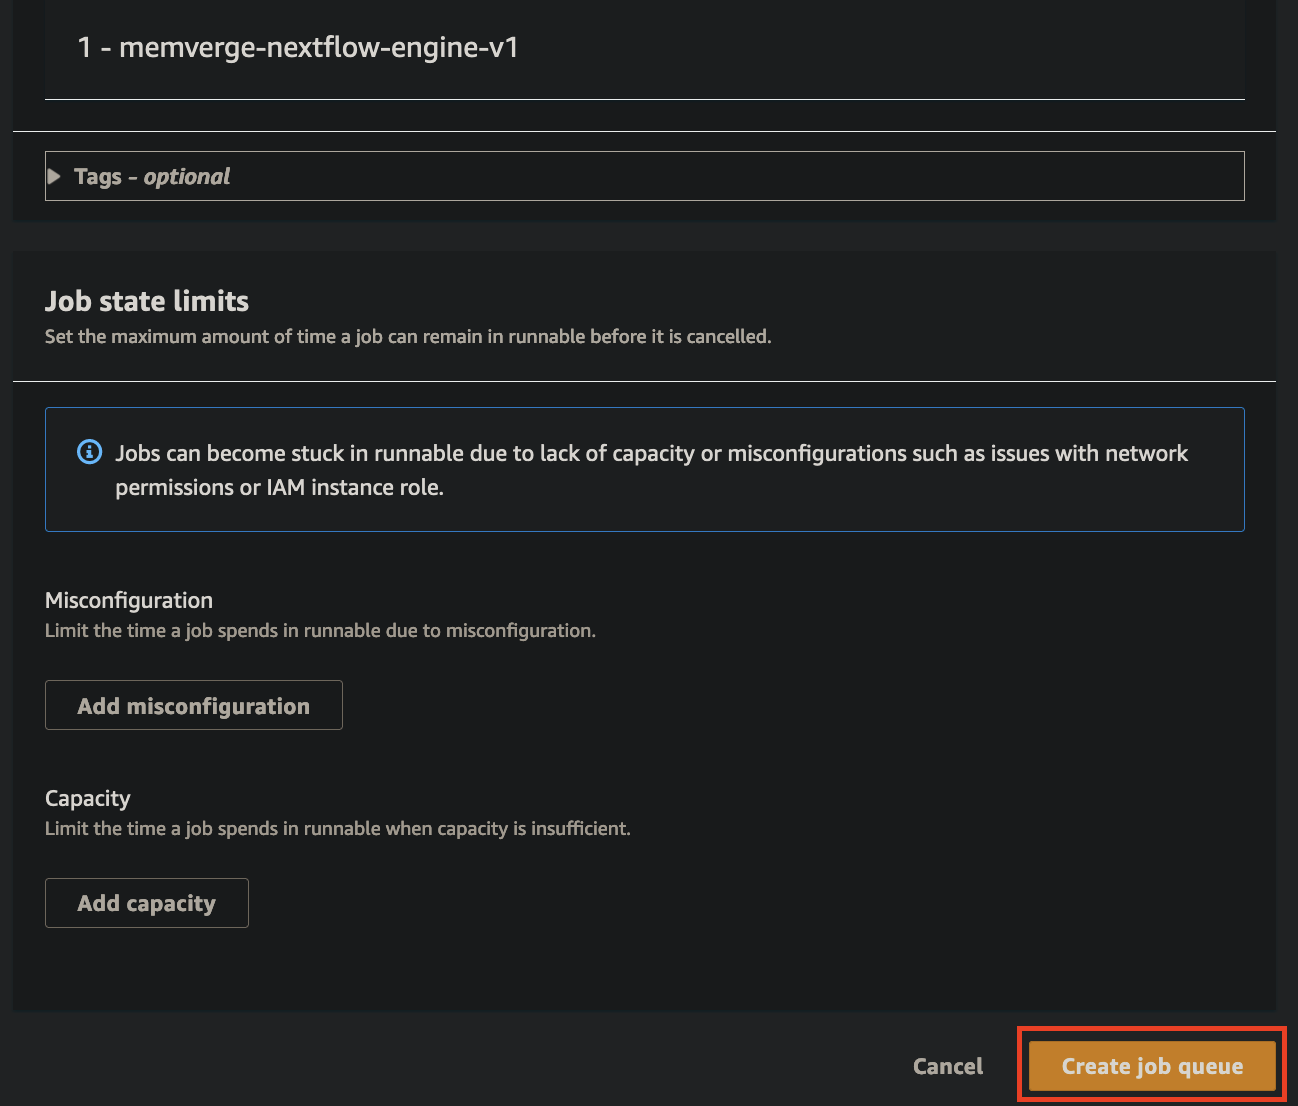
Job Queue
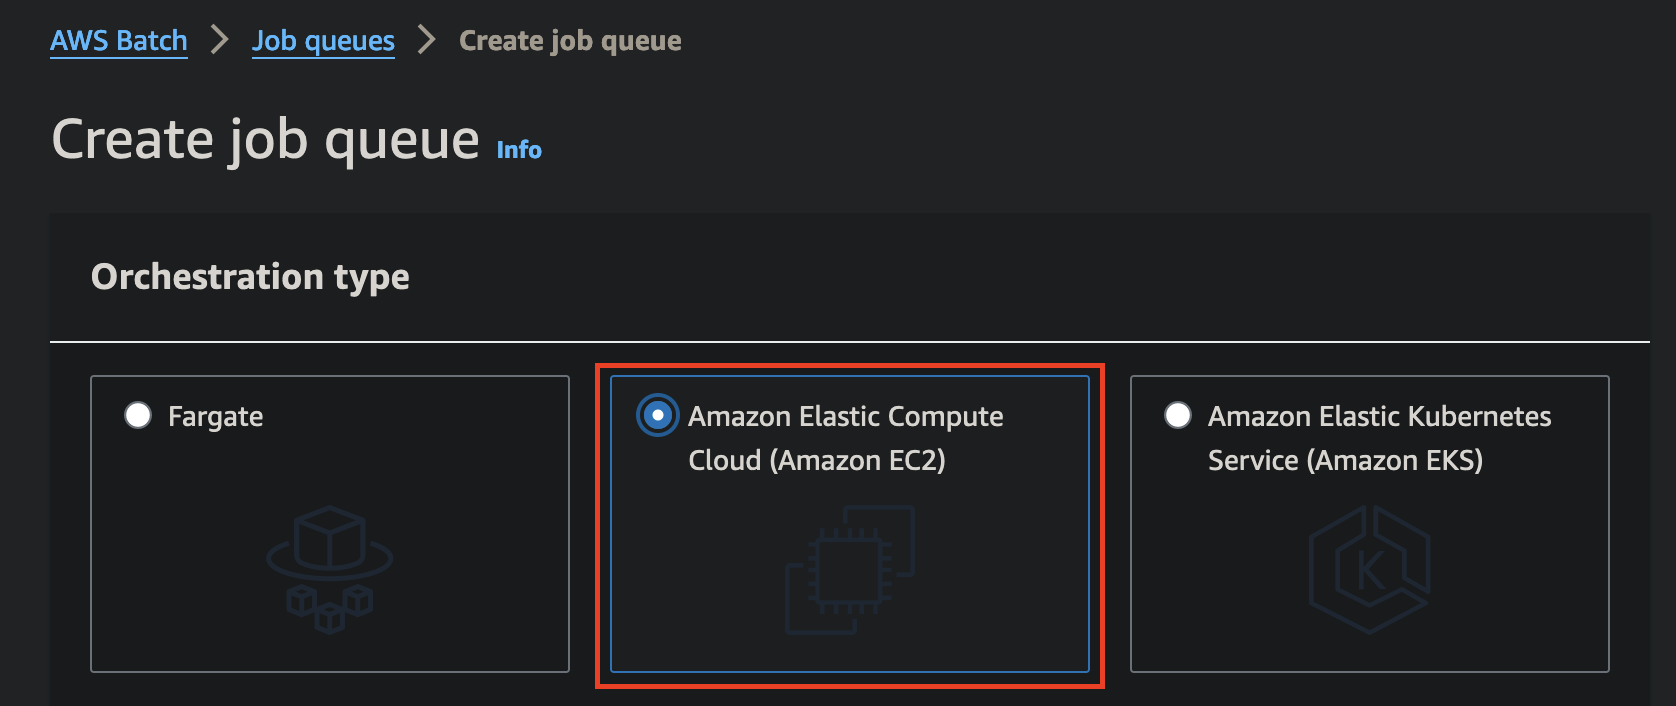
- Amazon EC2 configuration
- Connect to previously-made compute environment

Nextflow
aws.config
plugins {
    id 'nf-amazon'
}
process {
    executor = 'awsbatch'
    queue = 'aws-spot-q'
    maxRetries = 2
}

process.containerOptions = '--env MMC_CHECKPOINT_INTERVAL=5m --env MMC_CHECKPOINT_IMAGE_SUBPATH=nextflow --env MMC_CHECKPOINT_MODE=true --env MMC_CHECKPOINT_IMAGE_PATH=/memverge-mm-checkpoint'

aws {
    accessKey = 'access
    secretKey = 'secret'
    region = 'us-east-1'
    client {
        maxConnections = 20
        connectionTimeout = 10000
        uploadStorageClass = 'INTELLIGENT_TIERING'
        storageEncryption = 'AES256'
    }
    batch {
        cliPath = '/nextflow_awscli/bin/aws'
        maxTransferAttempts = 3
        delayBetweenAttempts = '5 sec'
    }
}
Environmental Variables
MMC_CHECKPOINT_INTERVAL = 5m(default 15m)MMC_CHECKPOINT_IMAGE_SUBPATH = checkpoint_dir
This is an optional variable that creates a subdirectory under your MMC_CHECKPOINT_IMAGE_PATH. Not having this variable will put all dumps into the MMC_CHECKPOINT_IMAGE_PATH.
MMC_CHECKPOINT_MODE = trueMMC_CHECKPOINT_IMAGE_PATH = /memverge-mm-checkpoint
nextflow run command
nextflow run sateeshperi/bwa-index -c aws.config -work-dir 's3://workdir-2'Run, Watch Logs, and Spot Interrupt
When the job is submitted, you are waiting for the Log stream name section to be populated, as well as your job to be in a Running state.
Before spot Interrupt

After spot Interrupt
