Deploy MMCloud OpCenter on Google Cloud Platform (GCP)
Quick-Guide
-
Log in to the Google Cloud Platform at console.cloud.google.com
-
From the Welcome page, use the dropdown menu on the top navigation bar to select the project you are working on.

-
From the Navigation Menu on the left side of the navigation bar, select
Marketplace.

-
In the search bar located in the middle of the page, type
MemVerge. The search will return a single result namedMemory Machine Cloud.

- Click on
Memory Machine Cloud - Click
Get Started - If you agree to the terms and conditions, click
Agree, then clickDeployin the pop-up window.
- Click on
-
You would see a page displaying the steps required to install the OpCenter using a Terraform template.

- Scroll all the way down and click Download. A zip file with a name in the format of
xxx_terraform.zipwill be downloaded to your local machine.

- Scroll all the way down and click Download. A zip file with a name in the format of
-
At the top right-hand side of the navigation bar, click the Activate Cloud Shell icon. A Cloud Shell terminal session will open at the bottom part of your browser window. Resize the terminal as needed.

You would also see message like below, please confirm again you are under the right project.
Welcome to Cloud Shell! Type "help" to get started.
Your Cloud Platform project in this session is set to mmce-project.
Use “gcloud config set project [PROJECT_ID]” to change to a different project.-
In the Cloud shell terminal, go to the right-hand side of the navigation bar, click the More icon (three dots), and then click Upload.

-
In the pop-up window, click Choose Files to locate and select the terraform module (zip file) just downloaded on your local machine, and then click UPLOAD. You can also determine where to save the files.

-
Navigate to the directory where you uploaded the file, and unzip the module.
yiwei_zhang@cloudshell:~ (mmce-project)$ ls
96d6513f-2283-4218-8b94-8a5a2dc2faf7_terraform.zip

yiwei_zhang@cloudshell:~ (mmce-project)$ unzip *terraform.zip
Archive:  96d6513f-2283-4218-8b94-8a5a2dc2faf7_terraform.zip
  inflating: README.md
  inflating: backend.tf
   creating: examples/
   creating: examples/marketplace-test/
  inflating: examples/marketplace-test/main.tf
  inflating: main.tf
   creating: modules/
   creating: modules/opcenter-vpc/
  inflating: modules/opcenter-vpc/outputs.tf
  inflating: modules/opcenter-vpc/README.md
  inflating: modules/opcenter-vpc/variables.tf
  inflating: modules/opcenter-vpc/main.tf
   creating: modules/opcenter-gce/
  inflating: modules/opcenter-gce/outputs.tf
  inflating: modules/opcenter-gce/README.md
  inflating: modules/opcenter-gce/variables.tf
  inflating: modules/opcenter-gce/main.tf
   creating: modules/apis/
  inflating: modules/apis/README.md
  inflating: modules/apis/main.tf
  inflating: outputs.tf
  inflating: providers.tf
  inflating: terraform.tfvars
inflating: variables.tf - Edit the
terraform.tfvarsfile (by typingvi terraform.tfvars, for example) to configure the project ID and a name for the OpCenter instance as follows.
mmc_project = "[PROJECT_ID]"
mmc_name = "[OP_CENTER_NAME]"
For example
NOTE: Please make sure that the project_ID is the current project you are in.
-
(Optional) Change any parameter values from their default values by editing the relevant entries in terraform.tfvars, for example,
mmce_region. -
Initialize the terraform environment by executing the command
terraform init.
yiwei_zhang@cloudshell:~ (mmce-project)$ terraform init

Initializing the backend...
Initializing modules...

Initializing provider plugins...
- Reusing previous version of hashicorp/random from the dependency lock file
- Reusing previous version of hashicorp/google-beta from the dependency lock file
- Reusing previous version of hashicorp/google from the dependency lock file
- Using previously-installed hashicorp/random v3.6.0
- Using previously-installed hashicorp/google-beta v5.10.0
- Using previously-installed hashicorp/google v5.10.0

Terraform has been successfully initialized!

You may now begin working with Terraform. Try running "terraform plan" to see
any changes that are required for your infrastructure. All Terraform commands
should now work.

If you ever set or change modules or backend configuration for Terraform,
rerun this command to reinitialize your working directory. If you forget, other
commands will detect it and remind you to do so if necessary.- Apply the terraform module by entering the following command and enter
yeswhen prompted.
terraform apply- Wait a few minutes, and you will see information about OpCenter upon completion.
Apply complete! Resources: 22 added, 0 changed, 0 destroyed.

Outputs:

mmc_project = "mmce-project"
opcenter_db_disk_name = "test-opcenter-302e0e-db"
opcenter_instance_name = "test-opcenter-302e0e"
opcenter_ip_addr = "34.132.126.70"
opcenter_nfs_disk_name = "test-opcenter-302e0e-nfs"
opcenter_website = "https://34.132.126.70"
vpc_name = "test-default"- Click on the
opcenter_websitelink or copy and paste the address into a new tab to open the MMC OpCenter, and here begins your journey with Memory Machine Cloud on GCP!
MMCloud OpCenter

Change Admin Password
We recommend changing the default username (admin) and password (memverge) for the opcenter after logging in for the first time.
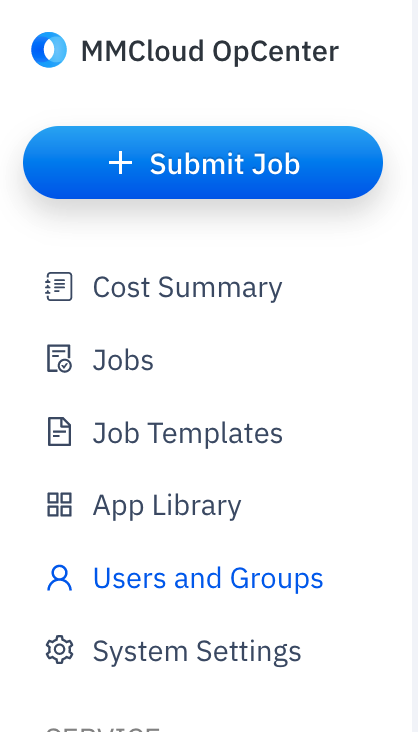
- Click on
Users & Groupsfrom the left navigation menu and for the admin user click onActionsand change the password as necessary.


Activate MMCloud License
- Log into your MMCloud OpCenter and activate license by clicking on the star icon in the top-right corner and enter your credentials

Download FLOAT CLI
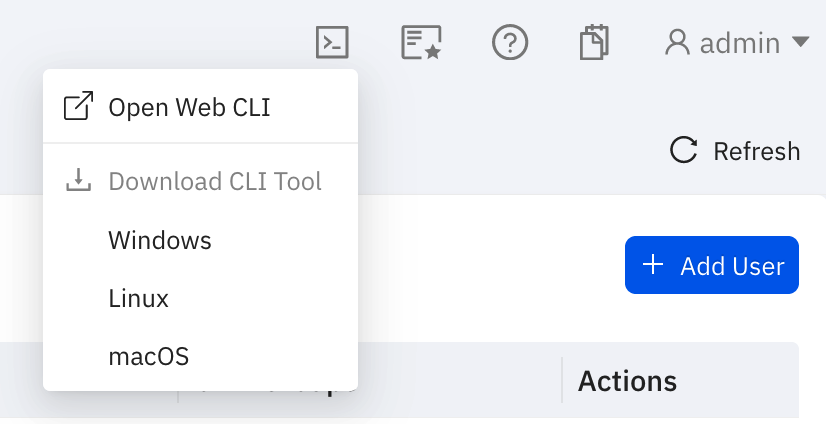
- The float CLI binary helps connect a user from any local machine to the MMCloud opcenter. To download the CLI, click on the terminal icon towards the top right corner of the opcenter and choose the version of CLI tool based on the operating system

- From macOS 10.15 (Catalina) onwards, zsh is the default shell. In zsh, float is a reserved word. To use the float CLI with macOS, either change the shell to bash or alias the word float to the float binary, as follows:
alias float = /path/to/float_binary/floatwhere
/path/to/float_binary/is the path to where you placed the float binary.
- To change the default shell from
zshtobashsee the following guide:
https://phoenixnap.com/kb/change-zsh-to-bash-mac
