Instance Setup
-
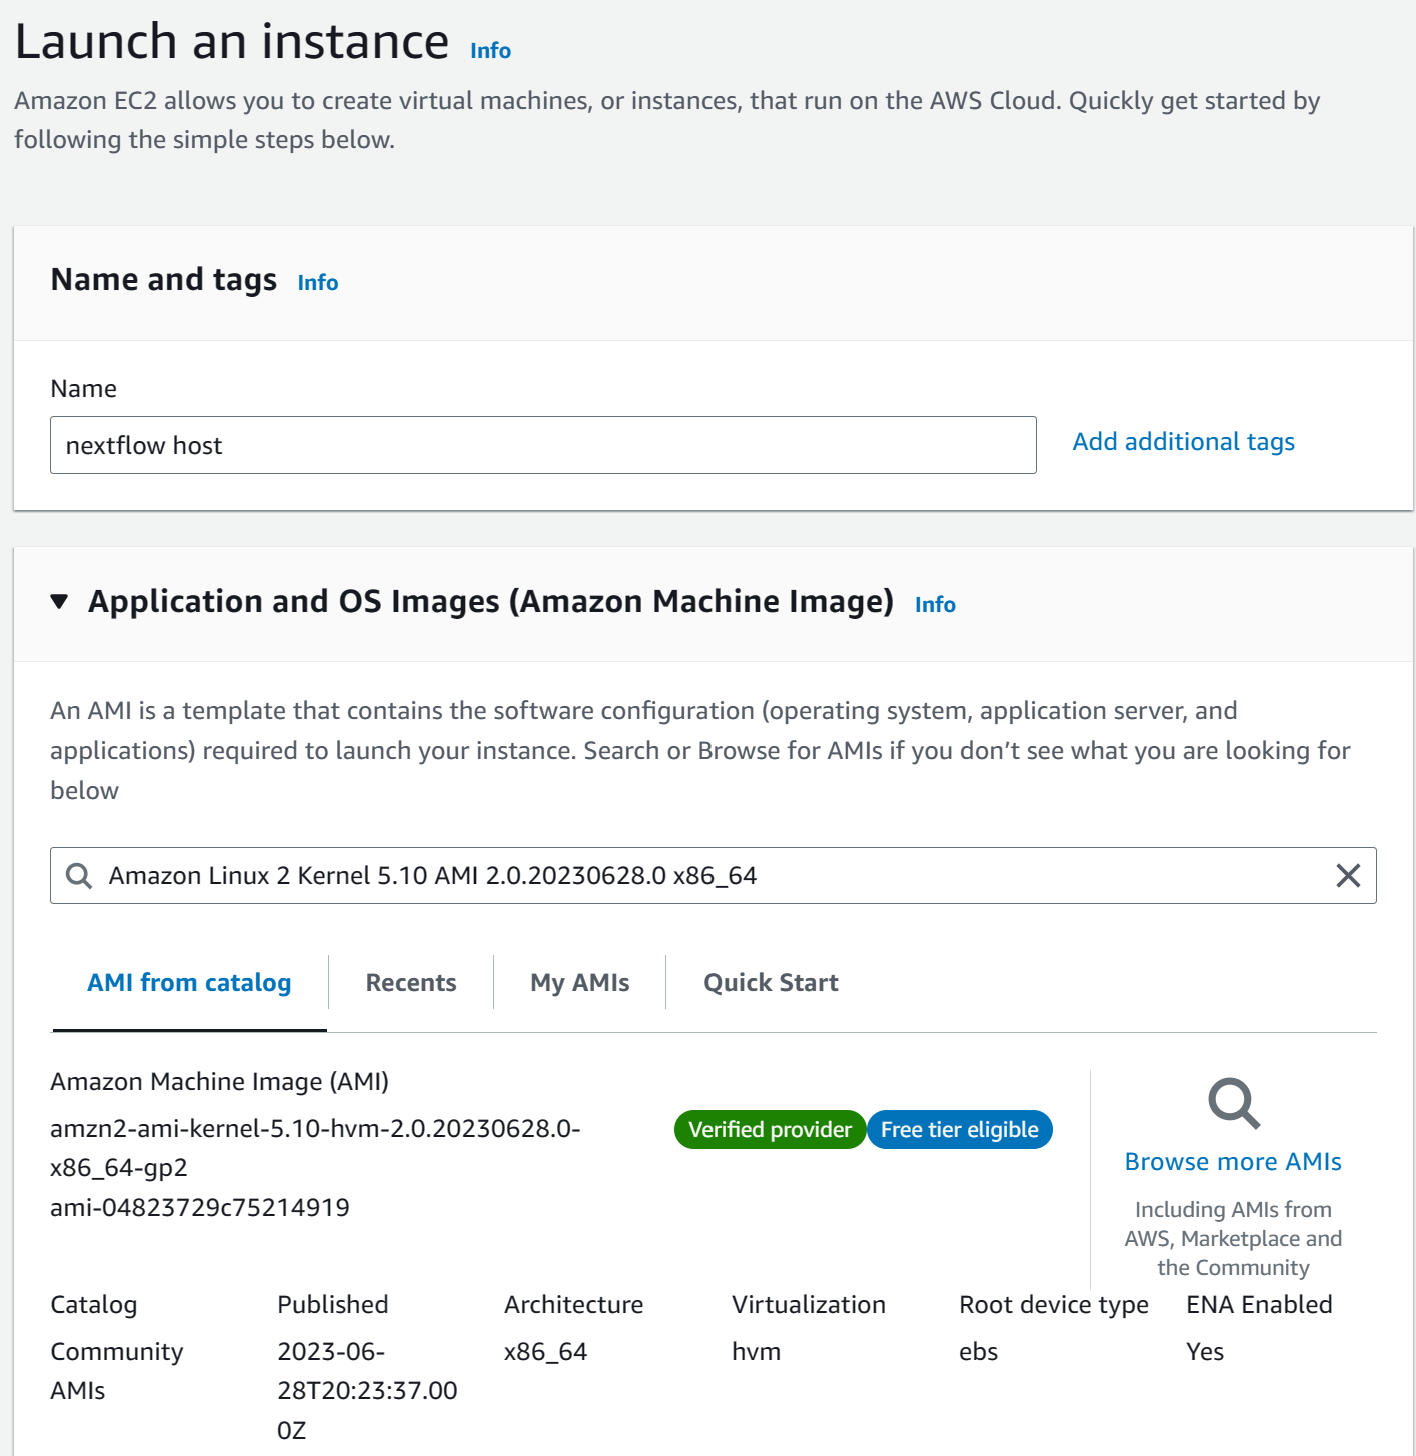
Launch EC2 Instance. From the EC2 console, click on Launch Instance

-
For AMI, search for amzn2-ami-kernel-5.10-hvm-2.0.20230628.0-x86_64-gp2

-
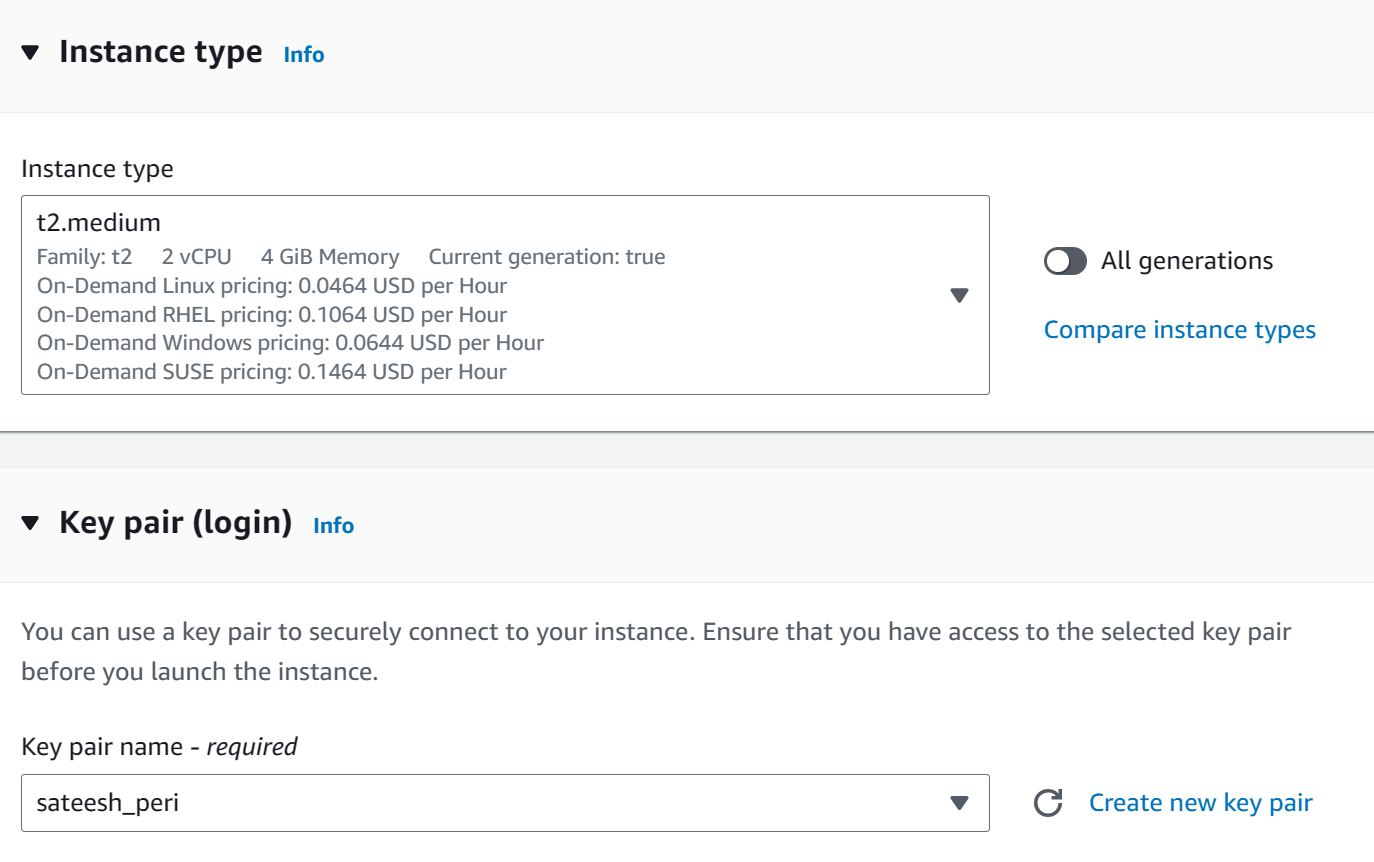
For Instance type, choose t2.medium and provide key-pair

-
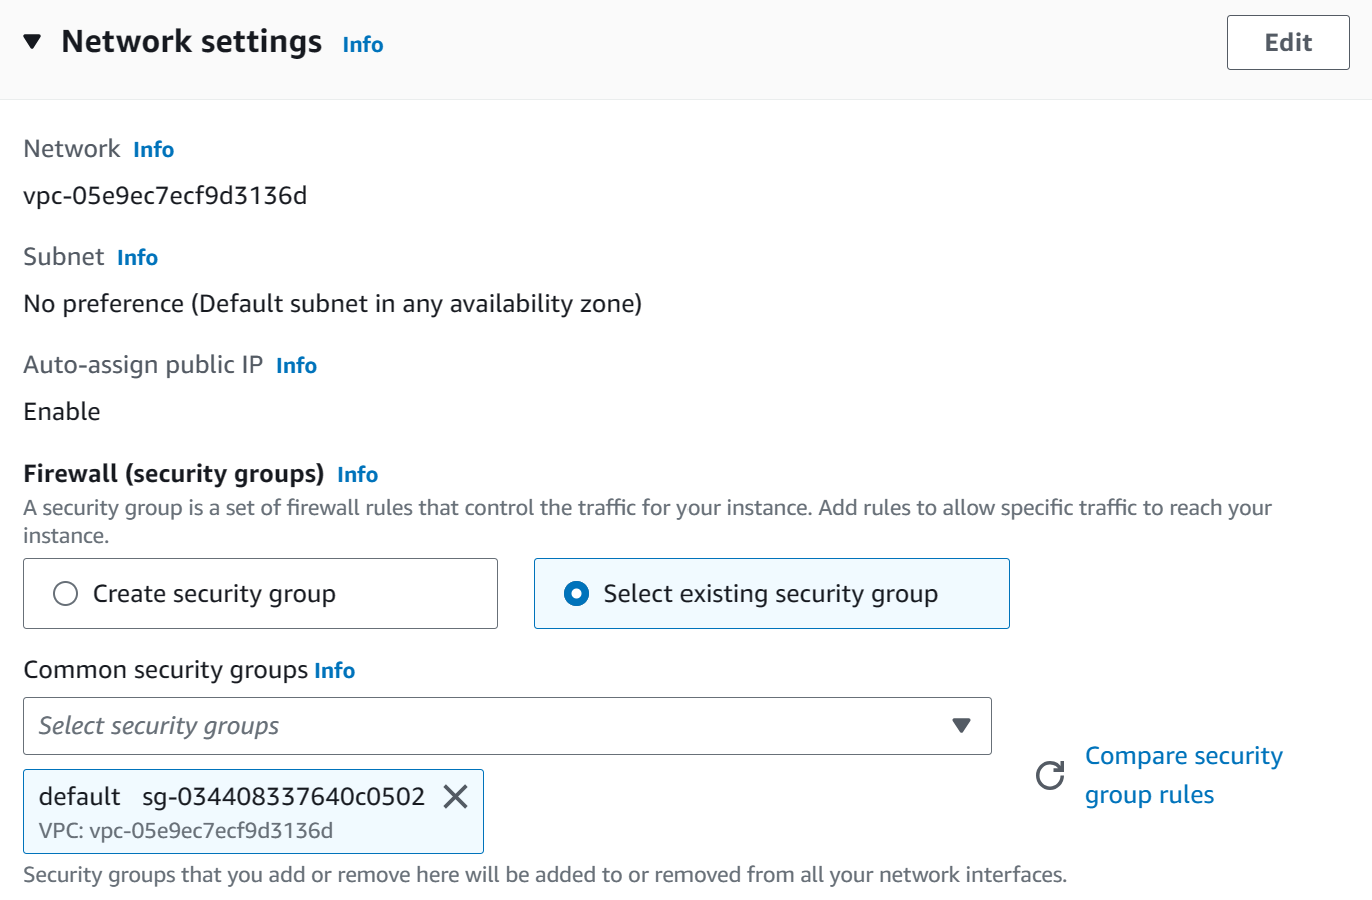
For Network Setting select existing default security-group

-
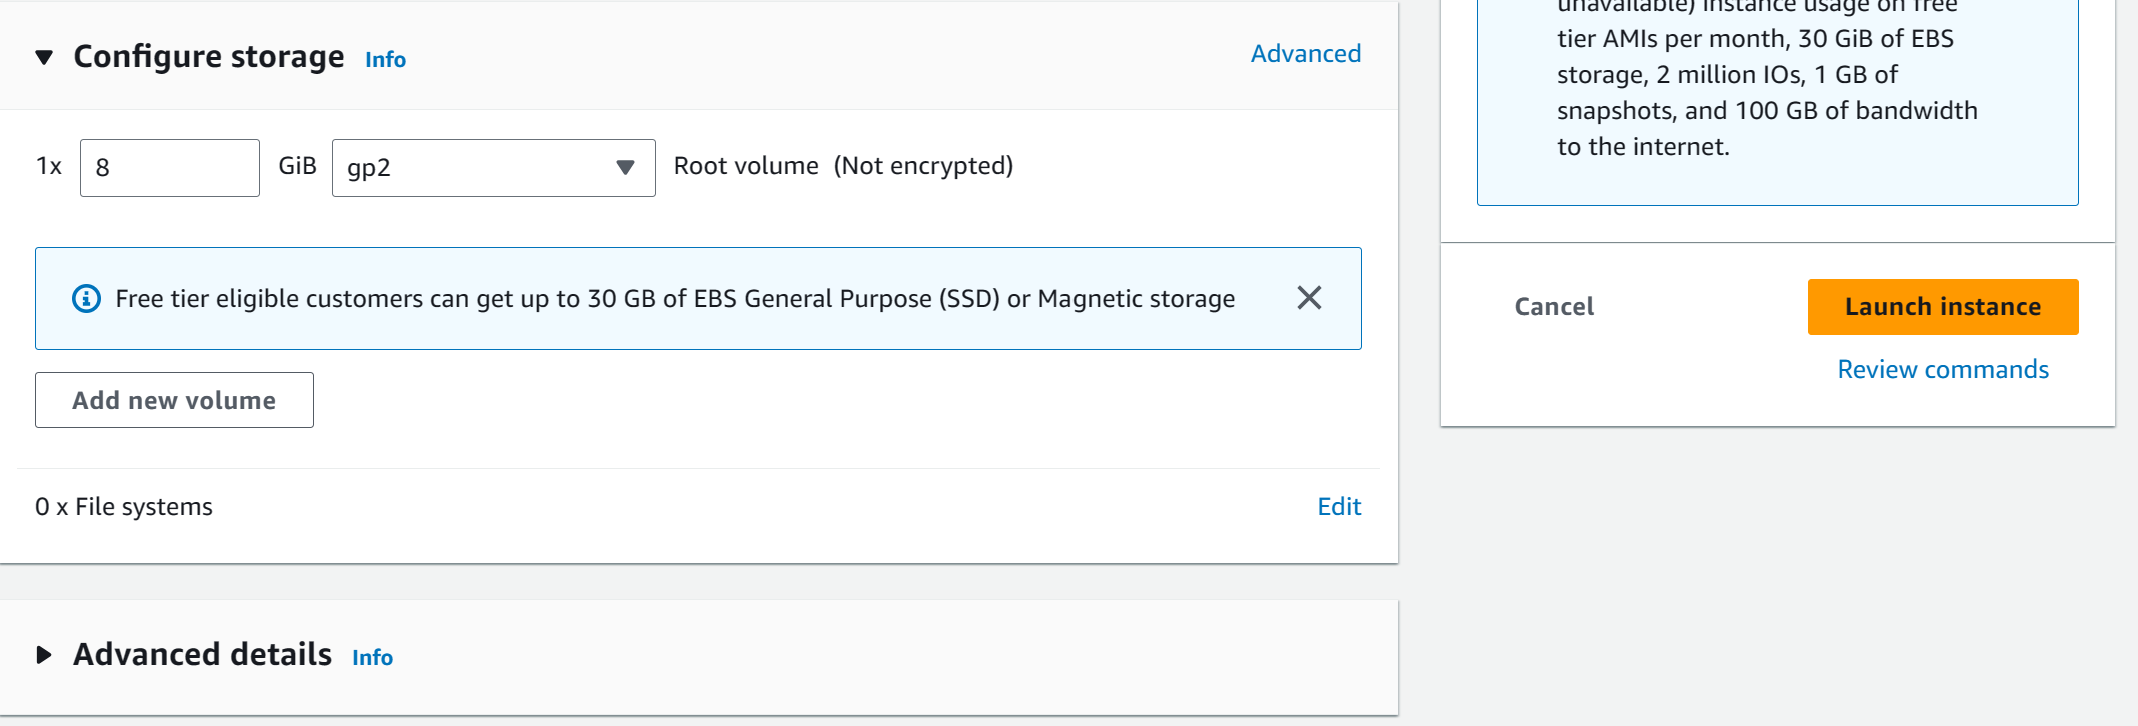
For Configure Storage, 8Gb of root volume is sufficient. Proceed to click on Launch Instance

MMC CLI Setup
Assuming your OpCenter is setup, to install the CLI:
wget https://<op_center_ip_address>/float --no-check-certificate
sudo mv float /usr/local/bin/
sudo chmod +x /usr/local/bin/float
Connect to your opcenter by loggin in:
float login -a <op_center_ip_address> -u <username> -p <password>Cromwell Setup
Install Java
curl -s "https://get.sdkman.io" | bash
source "/home/ec2-user/.sdkman/bin/sdkman-init.sh"
sdk install java 17.0.6-tem
java -version
Install Cromwell
wget https://github.com/broadinstitute/cromwell/releases/download/84/cromwell-84.jar

# Check version
java -jar cromwell-84.jar --version
Config file
Name your file cromwell-float.conf. Make sure you update the address to your OpCenter address
# This is an example of how you can use Cromwell to interact with float.

backend {
  default = float

  providers {
    float {
      actor-factory = "cromwell.backend.impl.sfs.config.ConfigBackendLifecycleActorFactory"
      config {
        runtime-attributes="""
                String f_cpu = "2"
                String f_memory = "4"
                String f_docker = ""
                String f_extra = ""
        """

        # If an 'exit-code-timeout-seconds' value is specified:
        # - check-alive will be run at this interval for every job
        # - if a job is found to be not alive, and no RC file appears after this interval
        # - Then it will be marked as Failed.
        # Warning: If set, Cromwell will run 'check-alive' for every job at this interval
        exit-code-timeout-seconds = 30

        submit = """
            mkdir -p ${cwd}/execution
            echo "set -e" > ${cwd}/execution/float-script.sh
            echo "cd ${cwd}/execution" >> ${cwd}/execution/float-script.sh
            tail -n +22 ${script} > ${cwd}/execution/no-header.sh
            head -n $(($(wc -l < ${cwd}/execution/no-header.sh) - 14)) ${cwd}/execution/no-header.sh >> ${cwd}/execution/float-script.sh

            float submit -i ${f_docker} -j ${cwd}/execution/float-script.sh --cpu ${f_cpu} --mem ${f_memory} ${f_extra} >  ${cwd}/execution/sbatch.out 2>&1
            cat ${cwd}/execution/sbatch.out | sed -n 's/id: \(.*\)/\1/p' > ${cwd}/execution/job_id.txt
            echo "receive float job id: "
            cat ${cwd}/execution/job_id.txt

            JOB_SCRIPT_DIR=float-jobs/$(cat ${cwd}/execution/job_id.txt)
            mkdir -p $JOB_SCRIPT_DIR
            cd $JOB_SCRIPT_DIR

# create the check alive script
cat <<EOF > float-check-alive.sh
SCRIPT_DIR=$(pwd)
cd ${cwd}/execution
float show -j \$1 --runningOnly > job-status.yaml
if [[ -s job-status.yaml ]]; then
    cat job-status.yaml
else
    float show -j \$1 | grep rc: | tr -cd '[:digit:]' > rc
    float log cat -j \$1 stdout.autosave > stdout
    float log cat -j \$1 stderr.autosave > stderr
fi
cd $SCRIPT_DIR
EOF

# create the kill script
cat <<EOF > float-kill.sh
SCRIPT_DIR=$(pwd)
cd ${cwd}/execution
float scancel -f -j \$1
cd $SCRIPT_DIR
EOF

            cat ${cwd}/execution/sbatch.out
        """

        kill = """
            source float-jobs/${job_id}/float-kill.sh ${job_id}
        """

        check-alive = """
            source float-jobs/${job_id}/float-check-alive.sh ${job_id}
        """

        job-id-regex = "id: (\\w+)\\n"
      }
    }
  }
}
S3 Bucket Setup
Follow the directions in this section: Setup Nextflow host on AWS - HackMD
Once you made your bucket and created your access keys, install s3fs:
sudo yum install automake fuse fuse-devel gcc-c++ git libcurl-devel libxml2-devel make openssl-devel
git clone https://github.com/s3fs-fuse/s3fs-fuse.git
cd s3fs-fuse
./autogen.sh
./configure --prefix=/usr --with-openssl
make
sudo make install
Create a password file with your access key and secret key in the form of
access_key:secret_keyChange mode your file to 600
chmod 600 ./passwd-s3fsMount your bucket to your designated mountpoint. If you are mounting to a directory that requires root privileges to access, you will need to use sudo to mount
s3fs BUCKET /MOUNTPOINT -o rw,allow_other -o multipart_size=52 -o parallel_count=30 -o passwd_file=~/.passwd-s3fsIf you plan on using an s3 bucket with your workflow, please update the f_extra line in the config:
String f_extra = "--dataVolume [accesskey=XXX,secret=XXX,mode=rw]s3://BUCKET:/MOUNTPOINT"Hello World (Read from Bucket)
Create hello.wdl
workflow helloWorld {
    String name
    call sayHello { input: name=name }
}

task sayHello {
    String name

    command {
        printf "[cromwell-say-hello] hello to ${name} on $(date)\n"
        sleep 30
    }
    output {
        String out = read_string(stdout())
    }
    runtime {
        f_docker: "cactus"
    }
}
Create hello.json in your bucket
{
    "helloWorld.name": "Developer"
}
Run command (edit for your corresponding mountpoint)
java -Dconfig.file=cromwell-float.conf -jar \
 cromwell-84.jar run hello.wdl \
 --inputs /MOUNTPOINT/hello.json
A successful workflow will end in something similar to the snippet below. You may ignore the text that appear afterwards. The most important part is the “Succeeded”
[INFO] [11/27/2023 18:15:23.336] [cromwell-system-akka.dispatchers.engine-dispatcher-30] [akka://cromwell-system/user/SingleWorkflowRunnerActor] SingleWorkflowRunnerActor workflow finished with status 'Succeeded'.
{
  "outputs": {
    "helloWorld.sayHello.out": "[cromwell-say-hello] hello to Developer on Mon Nov 27 18:12:55 UTC 2023"
  },
  "id": "a1f0606e-367f-43a5-9381-e4ebe09ffbcf"
}
[2023-11-27 18:15:24,91] [info] Workflow polling stopped
Sequence Workflow (Write to Bucket)
Create seq.wdl (edit for your corresponding mountpoint)
workflow myWorkflow {
    call sayHello
    call writeReadFile { input: s=sayHello.out }
}

task sayHello {
    command {
        printf "[cromwell-say-hello] hello from $(whoami) on $(date)"
        sleep 30
    }
    output {
        String out = read_string(stdout())
    }
    runtime {
        f_docker: "cactus"
        f_cpu: "2"
        f_memory: "4"
    }
}

task writeReadFile {
    String s

    command {
        printf "[cromwell-write-read-file] write input to a file: ${s}\n" > /MOUNTPOINT/my_file.txt
        cat /MOUNTPOINT/my_file.txt
    }
    output {
        String out = read_string(stdout())
    }
    runtime {
        f_docker: "cactus"
    }
}
Command
java -Dconfig.file=cromwell-float.conf -jar cromwell-84.jar run seq.wdlYou should expect to see the my_file.txt created and populated in your bucket