- MMCloud's Juiceflow solution provides a high-performance method for running Nextflow pipelines on the cloud by leveraging JuiceFS to optimize cloud storage for the work directory.
Read more about Juiceflow in a blog here
-
JuiceFS is a general-purpose, distributed file system compatible with any application. In the current MMCloud release, JuiceFS can only be used with a Nextflow host deployed using the OpCenter's built-in Nextflow job template.
-
While cloud storage formatted with JuiceFS offers high performance for work directories, input data often needs to be staged in the work directory.
-
Nextflow natively supports staging or even streaming inputs from S3 to the executors of the respective process steps. By defining the input S3 location as a Channel, the Nextflow framework ensures the data is available for the task.
-
However, with a large number of files, staging can become a bottleneck as the files must first be downloaded to the stage subdirectory in the work directory and then made available to the worker nodes for execution.
-
To avoid this staging bottleneck, input data in cloud storage can be mounted as data volumes, making the files available locally and bypassing the staging process.
-
Essentially, you can register storage and mount the storage bucket using S3FS as a data volume on the Nextflow head node and worker nodes as
--storage <storage-name>
Steps:
See the official Juiceflow Quick Guide for introduction on how to run nextflow pipelines on MMCloud
Register Storage
Available from float
v3.0.0-69ce0c9-Imperiaonwards
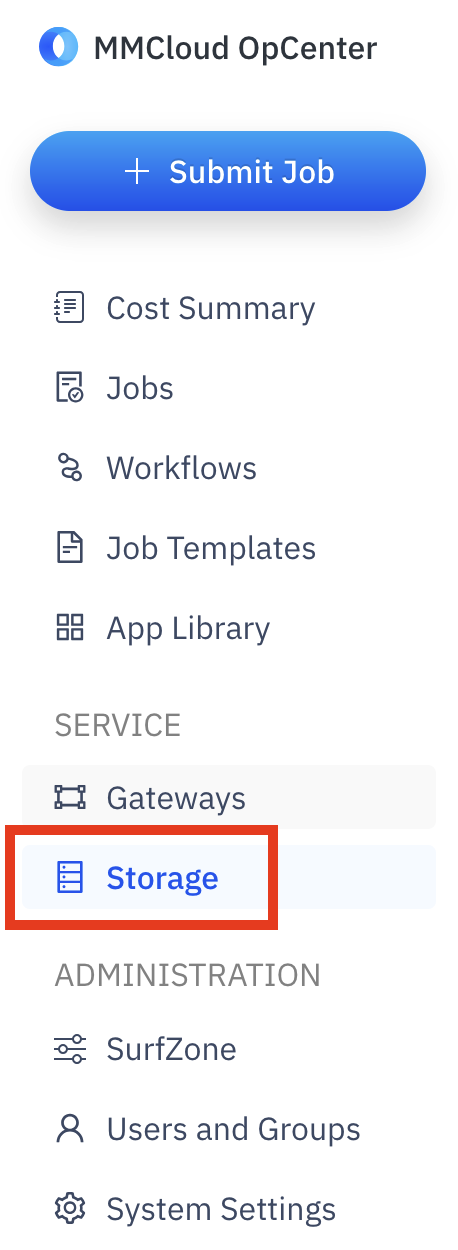
- In the OpCetner left navigation bar, click on
Storage
- Click on
Register Storagebutton

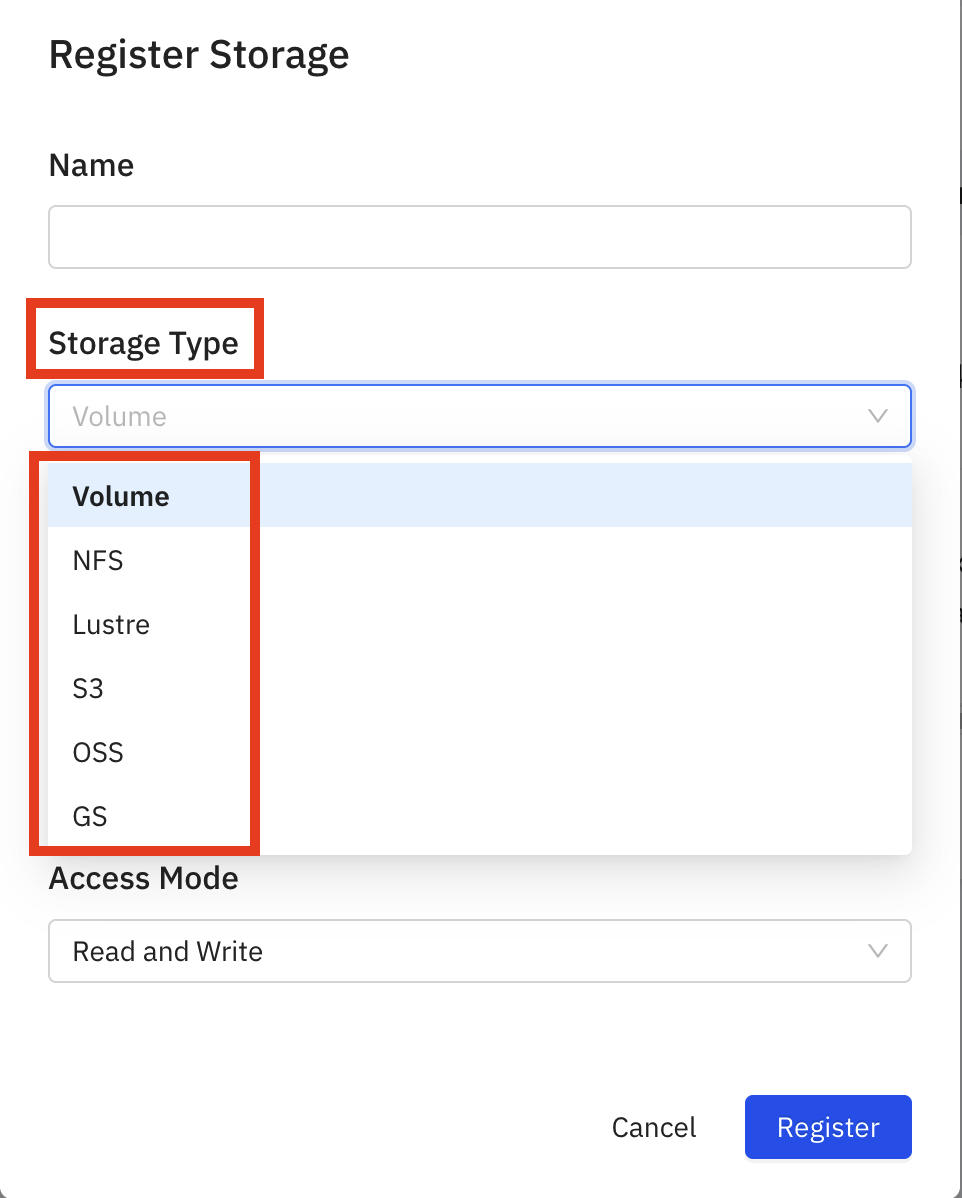
- Select
Storage Type
| Volume | col | col |
|---|---|---|
| NFS | content | content |
| Lustre | content | content |
| S3 | content | content |
| OSS | content | content |
| GS | content | content |
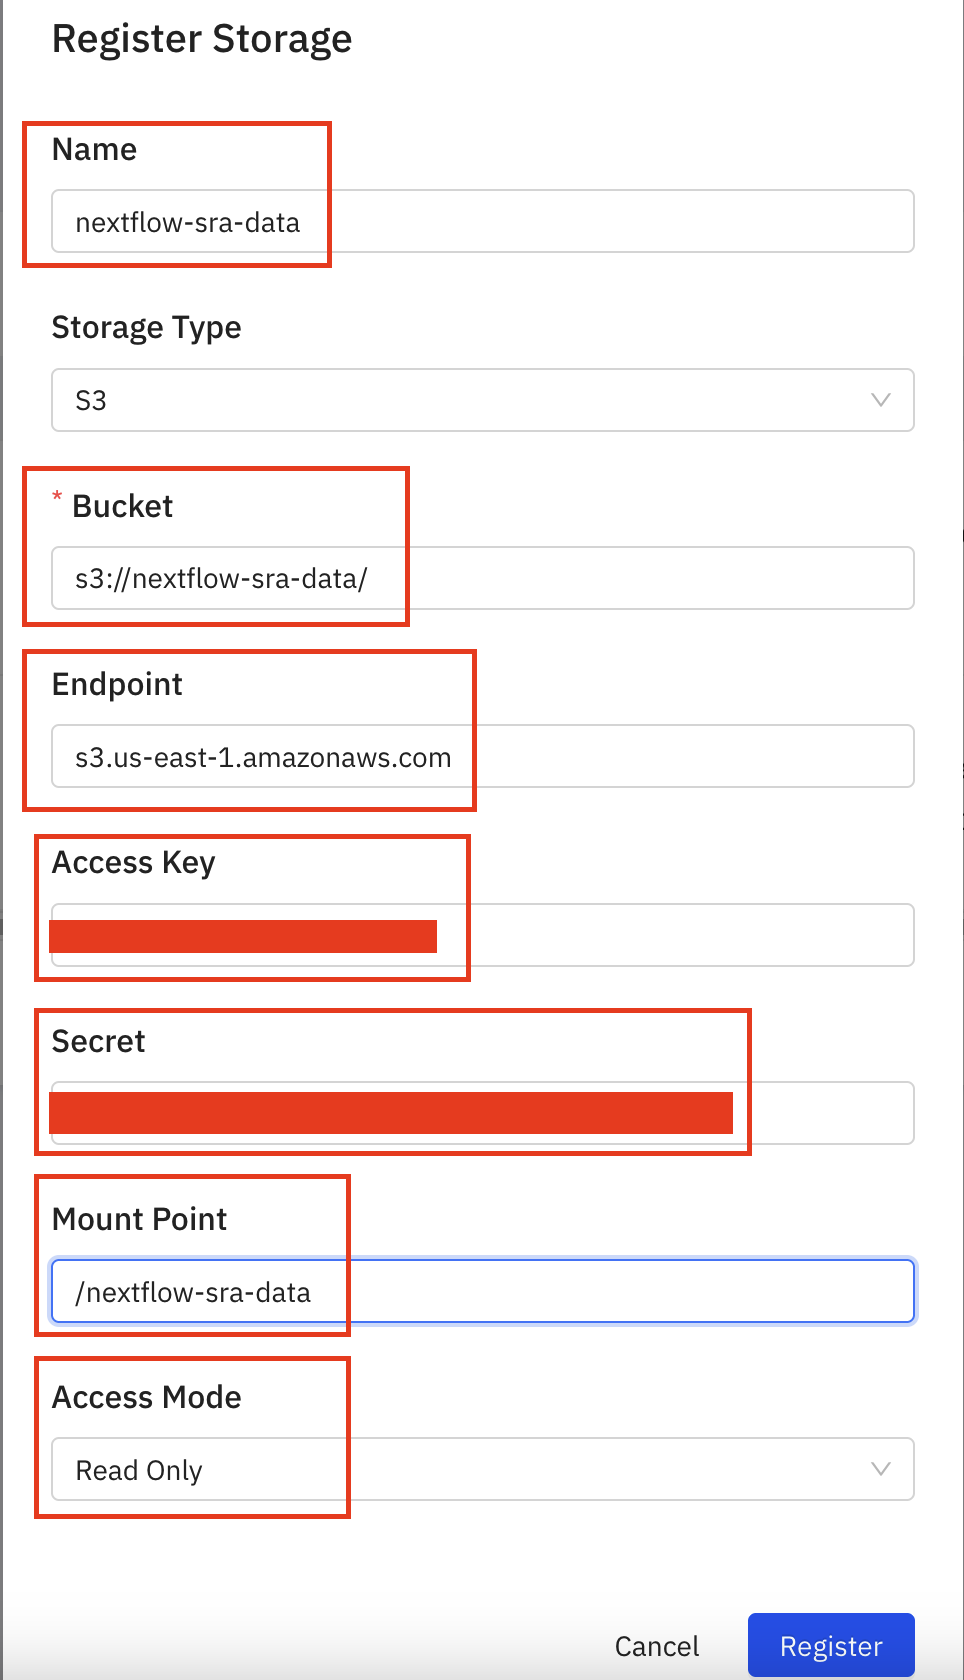
- Provide a
namefor the storage,S3 URI,endpoint,access key,secret key,mount-pointof the bucket and chooseAccess-Mode-Readonly orRead Write
Using storage arguments in JuiceFlow
- In your job script, add the input bucket as
--storage <storage-name>in theprocess.extrasection ofmmc.config:
process {
    executor = 'float'
    errorStrategy = 'retry'
    extra = '--dataVolume [opts=" --cache-dir /mnt/jfs_cache "]jfs://${jfs_private_ip}:6868/1:/mnt/jfs --dataVolume [size=120]:/mnt/jfs_cache --storage <storage-name-1> --storage <storage-name-2>'
}- Modify your sample sheet to now read from the storage mount point defined while registering storage
</storage-mount-point>:
group_id,subject_id,sample_id,sample_type,sequence_type,filetype,filepath
COLO829_Full,COLO829,COLO829T,tumor,dna,bam,/storage-mount-point/COLO829v003T.bam
COLO829_Full,COLO829,COLO829T,tumor,dna,bai,/storage-mount-point/COLO829v003T.bam.bai
COLO829_Full,COLO829,COLO829R,normal,dna,bam,/storage-mount-point/COLO829v003R.bam
COLO829_Full,COLO829,COLO829R,normal,dna,bai,/storage-mount-point/COLO829v003R.bam.bai- For the head node, add the
--storage <storage-name>variable to the float submit command:
float submit \
--hostInit transient_JFS_AWS.sh \
--hostTerminate hostTerminate_AWS.sh \
-i docker.io/memverge/juiceflow \
--vmPolicy '[onDemand=true]' \
--migratePolicy '[disable=true]' \
--dataVolume '[size=60]:/mnt/jfs_cache' \
--storage <storage-name-1> \
--storage <storage-name-2> \
--dirMap /mnt/jfs:/mnt/jfs \
-c 2 -m 4 \
-n <job-name> \
--securityGroup <security-group> \
--env BUCKET=https://<work-bucket>.s3.<region>.amazonaws.com \
-j job_submit_AWS.sh
This setup ensures efficient data handling by reading input data from input buckets using S3FS as staged data volume, while the work buckets leverage JuiceFS for high performance.
Using JuiceFS SnapLocation for better efficiency of checkpoint/restore
-
MMC can use either local EBS volumes or JuiceFS formatted S3 buckets for storing snapshot data
-
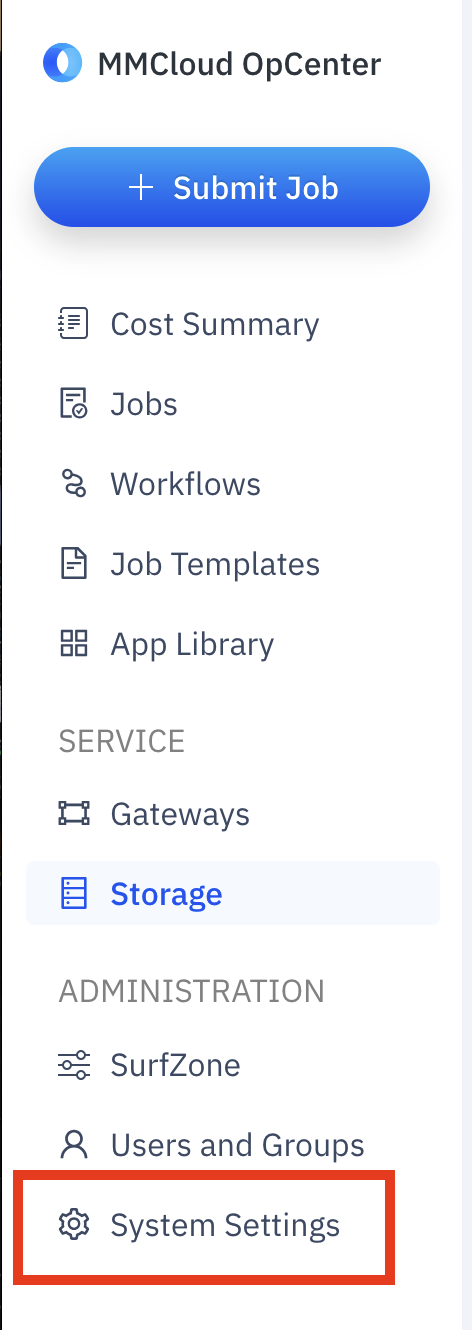
From the left navigation bar of the opcenter, click on
System Settings
- In System Settings, click on
Cloudsettings and go theSnapshot Locationfield
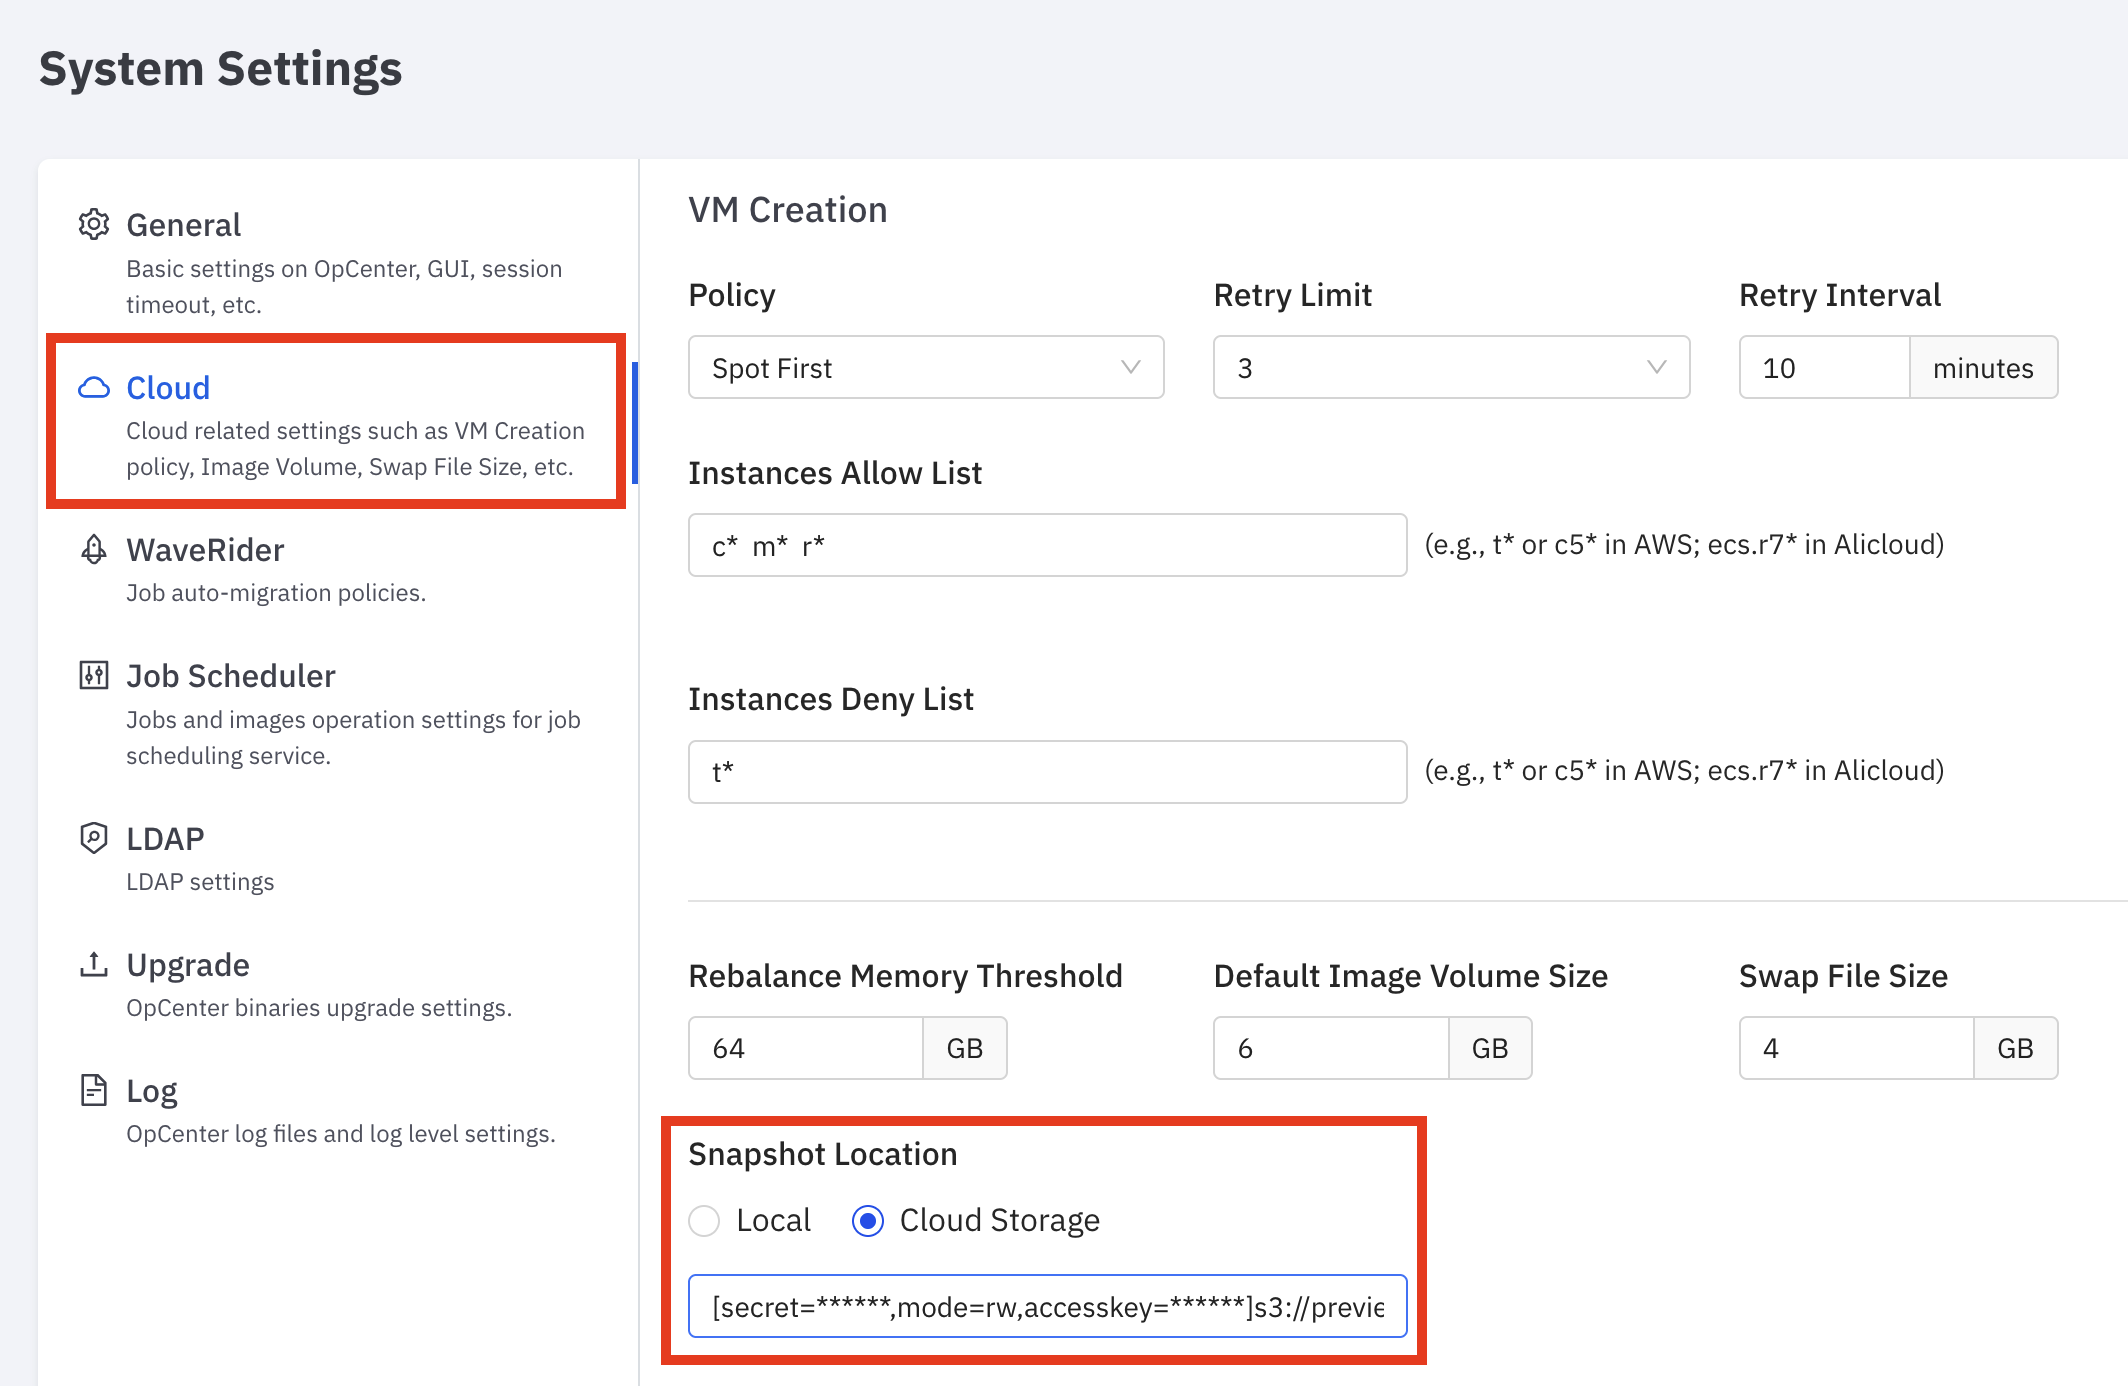
- Provide the S3 bucket URL in the following format making sure to include the
accesskey,secretkeyandmode=rw
[accesskey=<access>,secret=<secret>,mode=rw]s3://preview-opcenter-jfs-snaplocationNOTE: THE S3 bucket provided for snaplocation as above will be used to store the snapshot data of all jobs from all users in the opcenter and the data is cleared out automatically after a job finished